Creating Custom Glass Jewelry with Molds
- Understand the basics of using glass molds for jewelry.
- Learn about different types of molds for creating jewelry pieces.
- Discover essential tools and materials needed for glass molding.
- Explore step-by-step instructions to create stunning glass earrings and pendants.
- Get inspired with creative ideas for customizing your jewelry.
Jewelry making is an art form that allows you to express your creativity while crafting unique pieces. Utilizing glass molds significantly enhances this process, enabling you to create stunning and professional-looking jewelry. In this article, we will delve into the world of glass jewelry making using molds, discussing techniques, tools, and inspiration for your next project.
Understanding Glass Molds
Glass molds are essential tools for shaping glass into desired designs. When creating jewelry, using molds allows for consistent shapes and intricate details that can elevate your pieces. Let's explore the benefits of using molds:
| Benefits of Using Glass Molds |
|---|
| Consistency in Shape and Size |
| Ability to Create Intricate Designs |
| Ease of Use for Beginners |
| Variety of Shapes and Styles Available |
Essential Tools and Materials
To successfully create custom glass jewelry using molds, you will need some essential tools and materials:
Basic Tools
- Glass cutting tools
- Firing paper
- Kiln for fusing glass
- Safety gear (gloves, goggles)
Materials
- Glass sheets
- Glass frit (small pieces of glass)
- Rod and stringers
- Jewelry molds
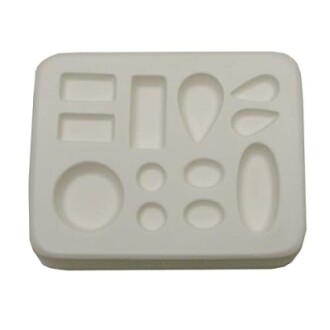
Featured Product: Earrings and Pendants Casting Mold for Glass Fusing
 Top Choice
Earrings and Pendants Casting Mold for Glass Fusing
This high-quality mold from Delphi Glass is designed for creating beautiful earrings and pendants with intricate details easily.
Learn MoreCreating Your Glass Jewelry
Here’s a step-by-step guide to creating your own custom glass jewelry using molds:
Step 1: Prepare Your Materials
Gather all your materials, including your glass sheets, frit, and molds. Ensure your workspace is clean and organized for efficient assembly.
Step 2: Cut the Glass
Utilize glass cutting tools to cut the glass sheets into the right shapes according to your mold's dimensions.
Step 3: Arrange in the Mold
Carefully place the cut glass inside the mold. Arrange different colored frits and stringers for added visual appeal.
Step 4: Firing
Place the mold in the kiln according to the manufacturer's instructions. Allow the glass to heat and fuse together to form your desired piece.
Step 5: Finishing Touches
Once cooled, remove the glass from the mold. You can then add findings or enhancements to your jewelry as desired.
Creative Ideas for Customization
Now that you know the basic process of making custom glass jewelry, let’s explore some creative ideas:
- Experiment with different color combinations to create vibrant pieces.
- Add dichroic glass for a shimmering effect.
- Incorporate layered designs using multiple molds.
- Create themed jewelry sets (e.g., matching earrings and pendants).
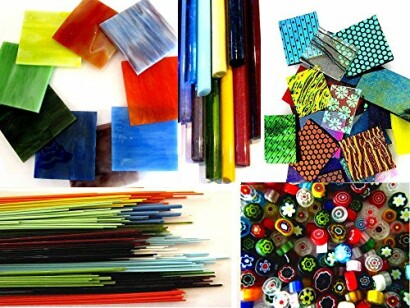
Featured Product: Devardi Glass COE 90 Fusing 1/2 Pound Combo Pack
 Creative Bundle
Devardi Glass COE 90 Fusing 1/2 Pound Combo Pack
This premium fusing pack includes a variety of colorful glass sheets, stringers, and rods to inspire your next jewelry project.
Explore NowWhere to Find More Resources
For more detailed information on tools and techniques for glass crafting, visit our resources section:
- Beginner Glass Making Techniques
- Glass Molds Information
- Glass Kilns Overview
- Fusing and Slumping Supplies
- Glass Art Project Kits
Conclusion
Creating custom glass jewelry with molds offers a wonderful opportunity for artists to showcase their creativity. With the right tools, materials, and techniques, you can design stunning pieces to cherish or gift. Explore our product selections and resources to enhance your glass-making journey!